
1. Mixing the Magic
In a large pot, combine milk, sugar, and a pinch of baking soda.
Stir over medium heat until the mixture boils.
2. Stirring to Perfection
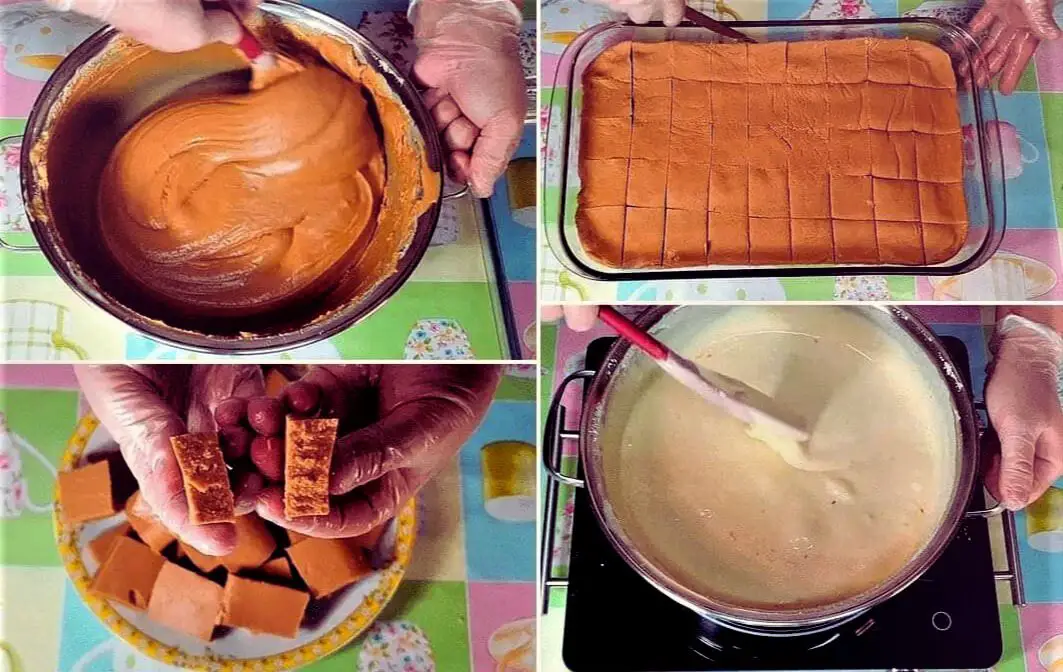
Continue stirring until the concoction thickens.
The candy will start turning light brown and loosen from the bottom of the pot (approximately 1 hour).
3. Cooling and Thickening
Turn off the heat and let it cool slightly.
Stir a little more, allowing it to thicken further.
4. Setting the Stage
Grease a large surface with butter.
Pour the fudge onto the surface.
5. Culmination of Sweetness
Let it cool completely before cutting into delightful pieces.
Tips, Shortcuts, and Variations
Tips for a Flawless Batch
To be patient is key. For the best texture, let the blend slowly get thicker.
If you don’t want the fudge to stick to the bottom, use a pot that doesn’t stick.
Shortcuts for Busy Bees
To save time, choose sugar that has already been weighed out.
For exact control of the heat, use a candy thermometer.
Storing Leftovers – Savoring the Sweetness
If you can’t eat the whole batch at once, put the rest in a jar that won’t let air in and leave it at room temperature. For up to a week, they stay fresh and keep their great taste and structure.
Pairing Suggestions: Making the Experience Better
Milk Panels can be used with a lot of different drinks because they are flexible. For a cozy evening, try them with a hot cup of coffee. For a standard pairing, enjoy them with a glass of cold milk. Want to try something new? For the ultimate treat, try them with a scoop of vanilla ice cream.
Don’t keep it to yourself if Milk Panels have made your kitchen feel magical. Please share this tasty recipe with your family and friends. Sign up for our blog to get more cooking stories, tips, and recipes that will make your mouth water.
ADVERTISEMENT
