
×
Ezoic
20g Unsalted Butter: Room temperature
Nutritional Benefits: Adds richness and creaminess to the sweet potato filling.
×
Ezoic
2-3 Tbsp Milk: Optional, if sweet potato has less moisture
Nutritional Benefits: Adds moisture and helps achieve the desired consistency. Use dairy or non-dairy milk based on preference.
10g (1 Tbsp) Wheat Flour: For binding
Nutritional Benefits: Flour helps to bind the sweet potato mixture together and provides structure.
×
Ezoic
20g (2 Tbsp) Water: For flour glue
Purpose: Mixed with flour to create a paste for sealing the spring roll skins.
Ezoic
For the Glaze:
30g (3 Tbsp) Sugar: For sweetness
Nutritional Benefits: Provides a sweet coating to the crispy snacks.
Ezoic
15g (1.5 Tbsp) Water: To dissolve the sugar
Purpose: Helps to make the glaze liquid and easy to brush or drizzle over the snacks.
6g (0.8 Tbsp) Soy Sauce: Adds depth and umami
Nutritional Benefits: Soy sauce adds a savory flavor that balances the sweetness. Use low-sodium soy sauce to reduce sodium intake.
Ezoic
Black Sesame Seeds: For garnish
Nutritional Benefits: Black sesame seeds add a nutty flavor and are rich in healthy fats, calcium, and antioxidants.
Ezoic
For Frying:
Oil for Frying: Use a neutral oil with a high smoke point, such as vegetable oil or canola oil.
Purpose: For deep frying the spring rolls to achieve a crispy texture.
Ezoic
Spring Roll Skins: For wrapping the sweet potato filling
Nutritional Benefits: Provides a crispy and golden coating to the sweet potato filling. Ensure you use fresh spring roll skins for best results.
Instructions:
Prepare the Sweet Potato:
Peel and cube the sweet potatoes. Place them in a saucepan with 20ml of water. Cover and cook over medium heat until the sweet potatoes are tender, about 10-15 minutes.
Ezoic
Mash and Season:
Drain any excess water from the sweet potatoes. Mash them with a fork or potato masher until smooth. Stir in the allulose (or sugar), salt, and unsalted butter. If the mixture is too dry, add 2-3 tablespoons of milk to achieve a creamy consistency.
×
Ezoic
Add Flour:
Mix the wheat flour with 20g of water to create a paste. Stir the paste into the sweet potato mixture to help bind the filling.
Assemble the Spring Rolls:
Place a small spoonful of the sweet potato mixture onto the center of each spring roll skin. Fold the sides over the filling and roll up tightly. Seal the edges with a bit of the flour paste.
Prepare the Glaze:
In a small saucepan, combine 30g of sugar with 15g of water. Heat over medium heat, stirring until the sugar is dissolved and the mixture is slightly thickened. Remove from heat and stir in the soy sauce.
Fry the Spring Rolls:
Heat oil in a deep pan or fryer to 350°F (175°C). Fry the spring rolls in batches until golden brown and crispy, about 2-3 minutes per side. Remove with a slotted spoon and drain on paper towels.
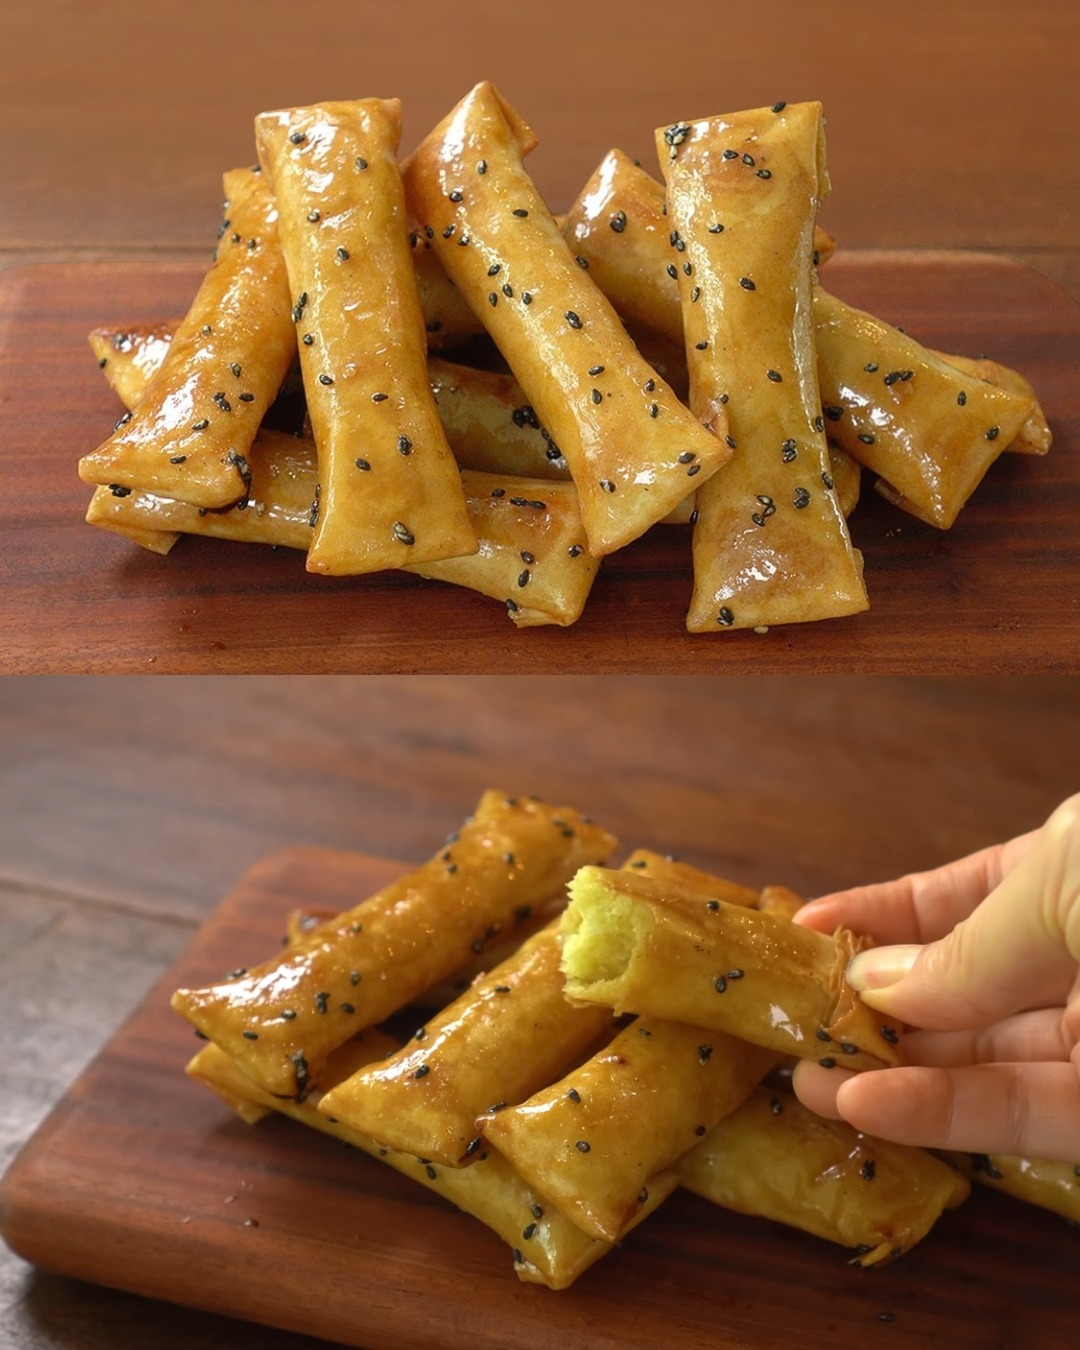
Glaze and Garnish:
Brush the warm spring rolls with the prepared glaze or drizzle it over the top. Sprinkle with black sesame seeds for an extra touch of flavor and presentation.
Serve:
Enjoy the sweet potato spring rolls warm. They can be served as a snack, appetizer, or light dessert.
Tips:
Ensure Fresh Spring Roll Skins: Use fresh, pliable spring roll skins for easy wrapping and to avoid tearing.
Monitor Oil Temperature: Maintain the oil at the proper temperature to ensure the spring rolls cook evenly and become crispy.
Adjust Sweetness: Feel free to adjust the amount of allulose or sugar based on your preference for sweetness.
Storage Tips:
Refrigerate: Store any leftover spring rolls in an airtight container in the refrigerator for up to 3 days.
Reheat: Reheat in the oven at 350°F (175°C) for about 10 minutes to restore crispiness. Avoid microwaving, as it may make the spring rolls soggy.
Nutritional Benefits:
Sweet Potatoes: Rich in vitamins, fiber, and antioxidants. This snack provides a healthier alternative to traditional fried treats.
Black Sesame Seeds: Add a boost of healthy fats and essential minerals.
ADVERTISEMENT
